2D and 3D physics for spine-unity
December 2nd, 2019
We are happy to announce improved support for HingeJoint and HingeJoint2D chains in our spine-unity runtime! This makes it easy to add realistic cape physics to your character, have it drag heavy objects around, swing a morning star, or much more.
HingeJoint and HingeJoint2D components are used to connect a Rigidbody or Rigidbody2D to one another, constraining them to move like they are connected by a hinge. It is perfect for doors, but can also be used to model chains, pendulums, and similar objects. When set up correctly, Unity's physics will apply momentum and collision response to all the chain elements. An important requirement is that chain elements must be laid out flat on the same hierarchy level, instead of forming a parent-child hierarchy.
Previous functionality
You might note that this functionality existed in previous spine-unity versions. You may have given it a try, but likely were unhappy with the result, no matter how you tweaked the Rigidbody parameters. The reason was that gravity was being applied, but it was not able to capture movement of the skeleton or parent bones, thus lacking momentum. Starting in the spine-unity 3.8, the physics rigging respects momentum and works correctly when flipping the skeleton.
Creating hinge chains
2D and 3D hinge chains are created from an existing SkeletonUtilityBone hierarchy.
Select the first SkeletonUtilityBone chain element and in the Inspector choose Create 3D Hinge Chain or Create 2D Hinge Chain to generate the physics rig. The selected element and all its SkeletonUtilityBone children are turned into a hinge chain. Adjust the Rigidbody drag and mass parameters to tweak the result to your liking. Raising the drag value will make the Rigidbody move slower and create the effect of being heavy or interacting with air.
Note that the chain root node is no longer parented to bones of the skeleton, but placed at the top hierarchy level of the scene. This is a requirement in Unity to have momentum applied properly. Do not reparent the chain root to bones of your skeleton, or chain elements will no longer be affected by skeleton movement!
2D hinge chains
- Create your SkeletonUtilityBone hierarchy as usual.
- Select the first chain element in the Scene panel and in the Inspector choose
Create 2D Hinge Chainto create the 2D hinge chain rig.
- This will remove the
GameObjectchain from the previous parent (cape-rootin the example) and place a newHingeChain ParentGameObjectat the top level of the scene. As mentioned above, do not reparent thisGameObjectto the skeleton!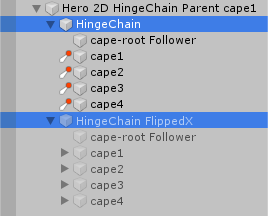
- Adjust the chain element
Rigidbodydrag and mass parameters to tweak the result to your liking.
Note that this GameObject contains two child objects, named Hinge Chain and Hinge Chain FlippedX. When the skeleton is flipped, these GameObject instances will automatically be activated and deactivated to enable the respective hinge chain.
3D hinge chains
- Create your SkeletonUtilityBone hierarchy as usual.
- Select the first chain element in the Scene panel and in the Inspector choose
Create 3D Hinge Chainto create the 3D hinge chain rig.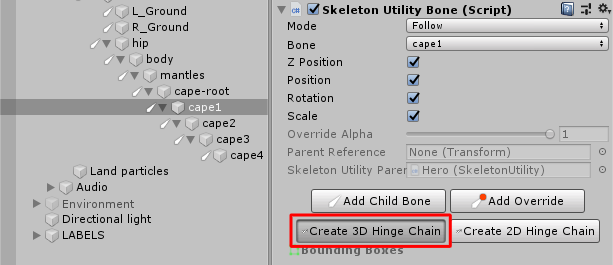
- This will remove the
GameObjectchain from the previous parent (cape-rootin the example) and place a newHingeChain ParentGameObjectat the top level of the scene. As mentioned above, do not reparent thisGameObjectto the skeleton!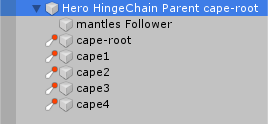
- Adjust the chain element
Rigidbodydrag and mass parameters to tweak the result to your liking.
When the skeleton is flipped, the HingeChain Parent GameObject will automatically be rotated by 180 degrees to adjust the hinge chain to the flipped bone locations.
These additions to our spine-unity runtime make it easy for physics to affect your skeletons for more dynamic behavior. Don't hesitate to share your thoughts and creations on the Spine forum!