Constraints
Constraints are not available in Spine Essential.
Constraints provide ways to adjust bones besides using the bone hierarchy. For example, bones can follow a path or rotate to point at other bones.
Constraints can be added to skins so the constraints are only active when the skins are visible.
Order
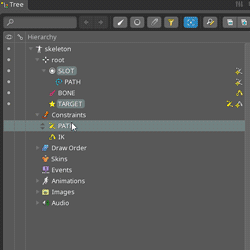
Constraints are shown in the tree under the Constraints node.

The order the constraints appear in the tree is also the order that the constraints are applied. The constraint at the top of the list is applied first, then each constraint below it is applied.
You may need to adjust the order to get the results you want. In setup mode, constraints can be dragged up and down to change their order.
When a constraint is created, Spine inserts it at a reasonable position in the constraint order. The Reset button in the tree properties for the Constraints tree node will automatically calculate a reasonable order for all the constraints.
Order example
In this example, when the IK constraint is applied first, the first bone is pointed at a second bone on the path, then the path constraint is applied to move the second bone along the path. The first bone is left pointing where the second bone was originally.
When the path constraint is applied first, the bone is moved along path, then the IK constraint is applied to point at the bone on the path. This is probably the desired behavior.
Bone transforms
After a constraint is applied, the bone world transforms are recomputed for the constrained bones and all their descendants. If a constraint is applied and modifies a bone, then another constraint is applied that causes the world transform for that bone to be recomputed, the modifications made by the first constraint will be lost.
Mix
Constraints have "mix" sliders that allow the constraint to be partially applied. When the slider for a constrained property is at 0, the constraint is not applied for that property. At 100, the constraint is applied fully. Between 0 and 100 results in a property value between the unconstrained pose and the fully constrained pose. This can be used to reduce the effect of the constraint or blend seamlessly between the unconstrained and constrained poses.
Some constraints allow negative mix values to constrain the property in the opposite direction or mix values over 100 to exaggerate the constraint's effect.
Folders
Constraints can be organized into folders. To create a folder, select a constraint and click New... Folder. Constraints can be moved between folders by dragging them.
In exported skeleton data, folder names are prepended to the constraint name to create the final name used in the Spine Runtimes. For example, if the folder weapons has a subfolder arms which has a constraint left-arm, then the constraint name at runtime is weapons/arms/left-arm.
Viewport bones
The editor area shows bones that are affected by a constraint as hollow. When a constraint is affecting the bone some transform tools may have a reduced effect or none at all, depending on the constraint mix. To adjust a constrained bone, the constraint's mix can be temporarily set to 0.

Tree annotations
The right edge of the tree displays annotation icons for bones that are constrained by or the target of a constraint. The icons can be clicked to select the constraint.

Copy/paste
Constraint settings can be copied by selecting a constraint from the constraint node, or focusing on its properties, and pressing ctrl+C (cmd+C on Mac). The copied information can later be applied to one or more constraints of the same kind by selecting them and pressing ctrl+V (cmd+V on Mac) to paste.