Licensing
A Spine license is required to integrate the Spine Runtimes into your applications.
FAQ
Import
When something goes wrong importing your skeleton into Unity there are a number of possible causes, from incorrect Spine export settings to incorrect settings in Unity. This video will help you better understand the correct settings for many common problems during import.
Why does import fail with a window saying "Could not automatically set the AtlasAsset for .."?
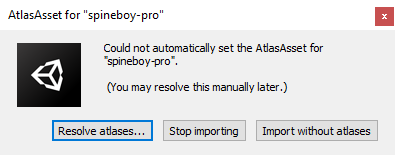
Please make sure that your have named the atlas file extension .atlas.txt and not .atlas. See Spine Unity Export for Beginners for details.
Why do I get the error "Opening scene in read-only package!" when opening a scene from a git UPM package?
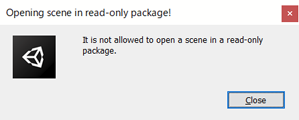
Unfortunately a bug in Unity causes the error "Opening scene in read-only package!" when trying to directly open a scene within a package downloaded via git URL. To open the example scenes contained in the package, please copy the scene files from the package directory to your Assets directory using your system's file manager (Explorer or Finder respectively).
Visual
Why do I get dark borders around transparent areas of my attachment images?
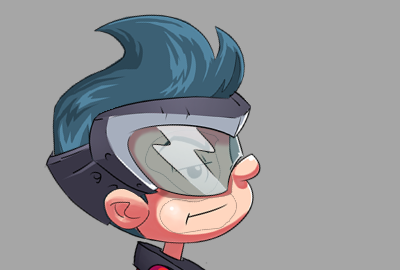
Most likely you have exported your textures as Premultiply alpha (PMA) but your import Material or Texture settings in Unity don't match this. See Premultiplied vs Straight Alpha Import for details. If you are using Linear color space, note that PMA textures are not supported.
Another potential cause is when straight alpha workflow is used together with Generate Mip Maps enabled in Texture import settings, but color bleed has not been applied to all transparent pixels. This may happen even when exporting from Spine with option Bleed enabled if you modify the exported texture in an image editor. Some do not properly re-apply color bleed in transparent areas where alpha is 0, leaving the RGB portion of the pixel black or white instead. Whenever the unmodified exported texture is displayed correctly but the modified is not, missing color bleed is likely the cause.
Why do I get colorful stripes in transparent areas of my attachment images?
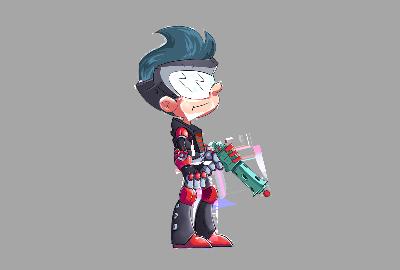
Most likely you have exported your textures as straight alpha (Bleed) but your import Material or Texture settings in Unity don't match this. See Premultiplied vs Straight Alpha Import for details.
Why do I get white borders around my attachment images when enabling Generate Mip Maps?
Most likely you have exported your textures as Premultiply alpha (PMA) but your import Texture settings in Unity have incorrectly enabled sRGB (Color Texture). See Premultiplied vs Straight Alpha Import for details.
Why does my skeleton display wrong colors when I enable the Tint Black option in the material settings?
Please make sure that you have enabled Advanced - Tint Black at the SkeletonRenderer (or SkeletonAnimation) component.
I tried assigning materials at the MeshRenderer, but it is not possible. Why?
The Materials are controlled by the SkeletonRenderer every frame, see section Materials for details. If you want to replace materials per instance or per Slot, see Changing Materials Per Instance.
Some of the included Spine shaders display incorrectly in my URP project. Why?
The spine-unity runtime package provides only Built-In Render Pipeline shaders, which are not compatible with Universal Render Pipeline projects. Please use the provided URP shaders of the Spine URP Shaders extension UPM package instead.
The Outline shader displays only outlines in my URP project. Why?
There are two potential causes:
-
You're using a Built-In Render Pipeline shader such as
Spine/SkeletonorSpine/Outline/Skeletonin your Universal Render Pipeline project. Built-In Render Pipeline shaders are not compatible with URP projects. Please use URP shaders of the Spine URP Shaders extension UPM package instead. -
If you're using the correct URP shader
Universal Render Pipeline/Spine/Outline/Skeleton-OutlineOnly, it renders only the outline because it's a single pass shader. You need to use e.g. theRenderExistingMeshcomponent to re-render your skeleton mesh with this outline-only shader to add the outline behind your skeleton.
See the com.esotericsoftware.spine.URP-shaders/Examples/Outline Shaders URP example scene included in the Spine URP Shaders UPM package for a working example setup.
The Outline shader displays inner outlines around skeleton parts. Why?
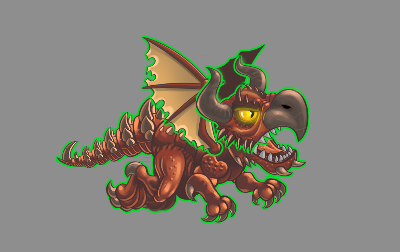
When your skeleton requires multiple materials, the included outline shaders will incorrectly outline each submesh instead of the whole skeleton. The best solution is to ensure that only a single material is used. This can be achieved by either packing your atlas accordingly, or by runtime repacking. If this is not possible, you can use e.g. the RenderCombinedMesh component to re-render your combined skeleton mesh with an outline-only shader to add the outline behind your skeleton. Available outline-only shaders are Spine/Outline/OutlineOnly-ZWrite for Built-In Render Pipeline and Universal Render Pipeline/Spine/Outline/Skeleton-OutlineOnly for URP.
How can I replace Materials per Slot?
See Changing Materials Per Instance.
I tried using a normalmap on a skeleton, but it looks wrong. Why?
Please make sure that you have enabled Advanced - Solve Tangents at the SkeletonRenderer (or SkeletonAnimation) component.
Why does SkeletonGraphic turn bright during fadeout of a UI panel via CanvasGroup alpha?
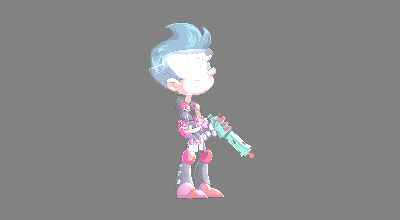
See section SkeletonGraphic Component - CanvasGroup alpha.
Why do individual parts of my skeleton show through during alpha fadeout?
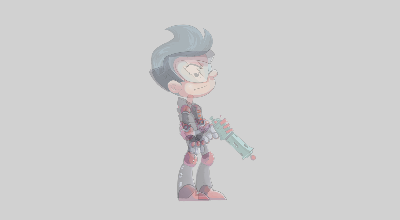
This is a common rendering problem of transparency being applied when overlapping triangles are drawn. See section Fading a Skeleton In or Out for more details.
Why does my repacked skin display in the Editor but shows white polygons in the built executable?
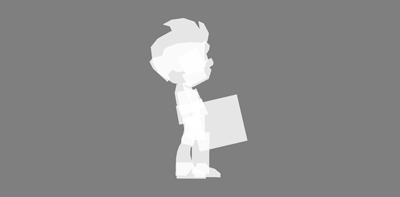
See section runtime repacking where you will find an info box that lists the most common causes for this issue.
Inconsistent behavior
I'm using UPM packages via git URLs, why does the project behave differently on two machines?
If you are using a git URL that ends with e.g. #4.2, this leads to the Unity Package Manager downloading the latest version from the branch 4.2. When the project is installing required packages for the first time, it downloads the latest required packages once. So a machine that downloads a required package earlier will have an older state of the package than another. You can select the package in the Package Manager and hit the Update button to update to the latest version by re-downloading the package. You can avoid this problem by replacing #4.2 in your git URL with a specific git commit hash like #5e8e4c21f11603ba1b72c220369d367582783744 to ensure everyone on your project has the same consistent state of the package. See below how to get a commit hash. Unfortunately the short commit hash like #5e8e4c21 does not seem to work with Unity Package Manager.
How can I get a git commit hash to use for the Package Manager git URL?
You can get the commit hash by visiting the github commits page, selecting the desired branch and clicking the copy button (with tooltip "Copy the full SHA") at the right side of the commit to copy the commit hash to the clipboard. 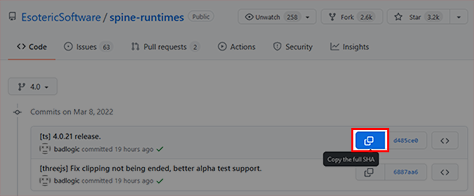
Performance
Instantiating a skeleton causes an fps drop or GC memory allocation. How can I improve loading?
- If you are exporting your skeleton as
.json, please consider switching to binary export as.skel.bytes. See Binary Export for Unity for details. - If you are instantiating skeleton prefabs during gameplay, consider loading the skeleton at level-load time, and also using a pool of objects instead of instantiating and destroying prefabs. Pre-warm the pool by loading e.g. 10 instances at a non-critical level-load timepoint. Enable and re-position objects instead of instanting new ones, and disable (and
ClearTracksonAnimationState) instead of destroying them.
I see many draw calls / batches / materials at a single skeleton. Why?
You are likely using multiple atlas pages or Slot blend modes in alternating draw order. See sections Materials and Material Switching and Draw Calls for details. When combining skins or attachments from multiple atlas textures, consider runtime repacking to repack attachments to a single atlas texture (at the cost of a single repack operation).
How can I improve the performance of a skeleton?
- Avoid using clipping polygons if possible, consider using Unity's masking features instead. If you need to use clipping attachments, use as few vertices at the clipping polygon as possible. The area of the polygon does not matter, only the vertex count does, so e.g. consider creating a large triangle instead of a two triangles to cover a rectangular area.
- Use as few mesh deformation keys as possible.
- Use as few vertices as possible.
- Remove unnecessary keys, don't key everything.
- Optimize any other metric displayed in the Metrics view in the Spine Editor.
- Use as few atlas page textures as possible.
- When requiring multiple materials per skeleton, try optimizing your draw order in Spine to minimize the number of Material switches, or try optimizing atlas texture export so that attachments next to each other in the draw order list are grouped to the same atlas page texture. See sections Materials and Material Switching and Draw Calls for details.
- Try sharing a single larger atlas texture between multiple skeletons where possible. You can assign a single AtlasAsset at the SkeletonDataAsset atlas assets array of different skeletons. See Packing for details. You may consider packing by folder structure or using the Command Line Interface.
